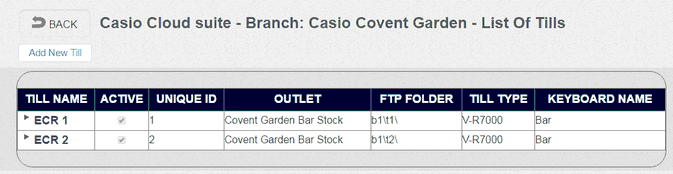
The 'List of Tills' shows all the terminals that have been set up and configured for the currently selected Branch. Click the 'Add New Till' button to add a till. This will allow you to name each Cash Register to a meaningful description to easily identify it. At this point you can link it to its designated stock area.
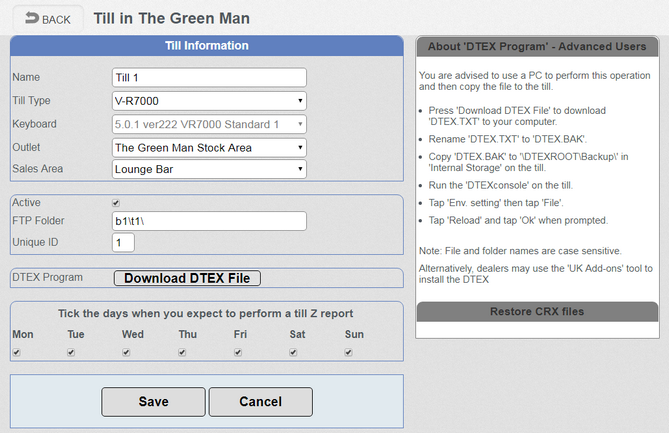
➢ Name is used to give a meaningful way to identify a till, for example in a large business it could be main bar terminal 1 abbreviated to Main 1
➢ The Till Type is currently set by the Supplier of the cash register and will correspond to the terminal installed.
➢ The Till Keyboard type can be changed depending on the keyboard layouts available. See Keyboards section for further information on how to program the keyboards.
➢ Tills are linked to an Outlet to deplete stock from the correct area when sold at the Till. for example Tills 1 and 2 are linked to the stock area in the main bar and the terminals 3 and 4 are linked to the restaurant as they hold their own stock.
➢ If the Active Flag is un-ticked the Cloud Suite will not process any sales data or try to prepare data for sending to this Till.
➢The FTP folder and Unique ID are for reference purposes only.
➢ The DTEX Program will be configured for each terminal by the Till supplier
➢ The Days of the Week are used to send notification if a terminal has not sent its Z data on the expected day. If a terminal is in a function room it might only be used at the weekends so notifications should not be sent during the week - in this case, you would maybe only tick Fri, Sat, Sun.