A new PLU can be created from the PLU List screen by clicking the 'Add New PLU' button.
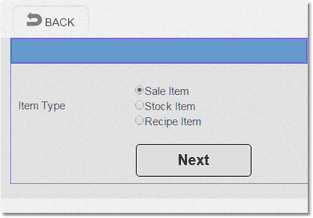
A choice of 'Item Type' will be displayed. Select 'Sale Item' and click 'Next'. The options for 'Stock Item' and 'Recipe Item' are explained later in the manual.
The following steps can be used to quickly create a PLU without having to re-enter common data.
1. 'Name'. Type the name of the product. This will appear on reports and other records in the Cloud. It is not sent to the V-R.
2.'POS Name(24char)'. The text you entered in 'Name' is automatically copied to 'POS Name (24char)' field. This is the text that will appear on the POS screens - you may enter a different name if you wish but be careful to avoid confusion.
3. 'Scancode'. Enter a scancode (barcode) if applicable. Clicking the 'Validate' button will check your entry to make sure it is a valid barcode (checksum is correct).
4. 'Sale Price'. Enter the retail price including VAT.
5. 'Department'. Select the Department to which this product will belong from the drop down list.
6.'Parameter'. Select the 'Item Parameter' setting that will apply to this PLU. See Item Parameter for details on this.
7.'Tax Code'. Select a Tax Code. E.g. 'TAX1'. Tax Codes are set up in Configuration-VAT.
8.'Colour'. This is the colour that the button for this PLU will have on the keyboard.
9.On the right side of the screen, you can add any 'Price Shifts' for this PLU. For example, if a Happy Hour price for this product is less than the main price, you can add this to one of the price levels and then use the Scheduler feature to action these prices at set times. If you are using the 'Timed PLU (Buffet function)' feature, you must set 'Price10' with the price that will be added to the 'Sale Price' if the customer overstays the initial timed period. See the main V-R manual for full details.
10. Click 'Add'. The cursor returns to the 'Name' field and only certain fields are cleared. This is because you will often want to add another very similar PLU right away.
11. As you can see, if you are adding another similar PLU, a minimal amount of extra information will be needed; usually 'Name' (which you can copy to 'POS Name'), 'Scancode' and 'Sale Price'.
12.Repeat to add all your PLUs.
13. When you have finished, a 'Prepare Data for Sending' followed by and 'OPEN' on the till will load the changes onto the till.
