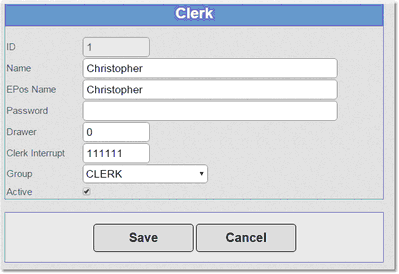
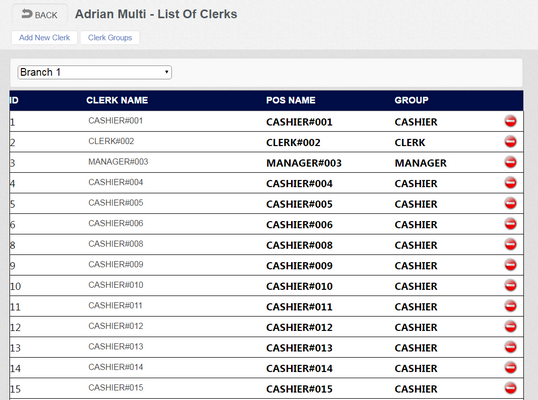
Clerks are set up on the Cloud Suite and downloaded to the EPOS terminal. Each Branch has its own set of individual cashiers and you can switch between Branches using the drop down list at the top of the screen. If you delete a Clerk, they will only be deleted in the current Branch.
The grid shows:
➢ID: The number associated with this Clerk in the underlying database.
➢CLERK NAME: Usually the full name of the employee.
➢POS NAME: This may be just their first name or nickname.
➢GROUP: The 'Clerk Group' to which the Clerk belongs. Clerk Group settings control the permissions a Clerk may have for certain till operations.
➢'Delete' button ![]() : Allows you to delete a Clerk.
: Allows you to delete a Clerk.
Clerks can sign on to the cash register in a number of ways:
1.Pre-set buttons with Clerks associated with them. Clerk just taps the correct button.
2.Numeric sign on code with optional password confirmation. Clerk taps in their code to sign on.
3.Dallas Keys (iButton) - the association of Dallas Keys with Clerks must be performed on the EPOS terminal.